

Screen landing re-trim procedure

Entry posted by slewthy
1,569 views
Very exciting!! (well for me)
The bit of the dash next to the windscreen is called the screen landing and is, infact, part of the bodyshell i.e. not removable. As outlined in other threads, this was trimmed at Lotus before the screen went in, so unless the screen is out/broken/removed etc, it needs to be retrimmed insitu, screen in the way. The problem is that there is a very narrow space at the junction and whilst it is part hidden from the outside by the black screen finishing tape, from the inside it is very much on show. SO, here is my procedure for retrimming this with minimal fuss.
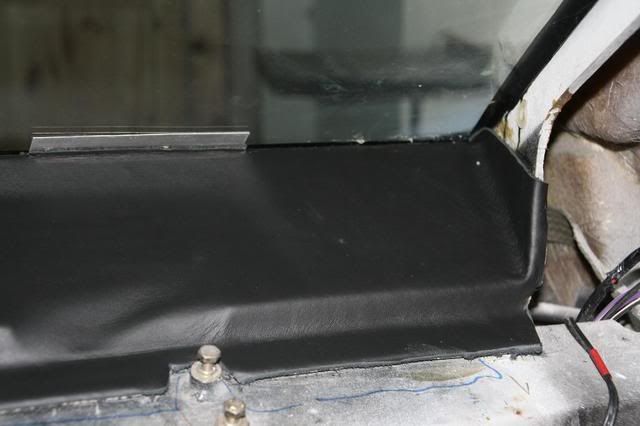
The arrangement is as follows
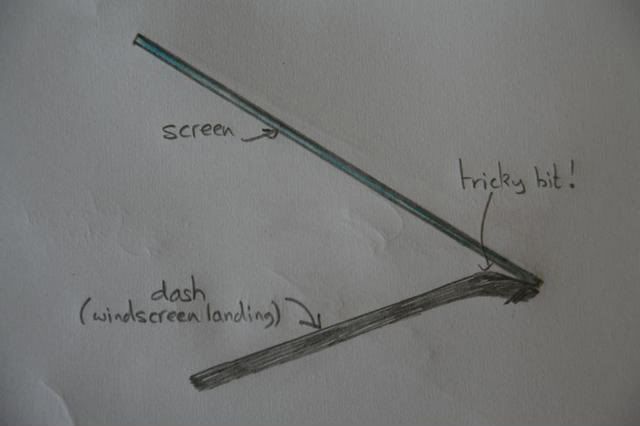
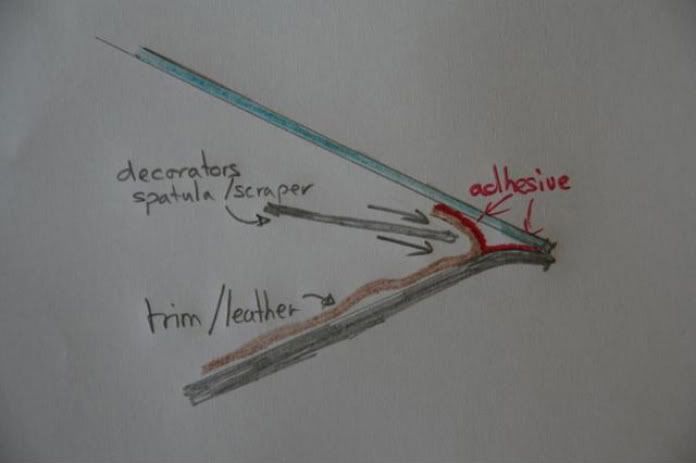
You can see the narrow angle that needs dealing with. My original solution was to use Timebond adhesive on the premise that I could slap it on and then ease the leather down the space. Forget it! Timebond allows only fine adjustments to be made and my tests showed this technique would not work at all. Its also a very strong glue so a mistake would be costly. It has another useful property however in that it is much more solid than other impact adhesives so doesnt drip and clart everything else up. It can be applied with a spatula or brush.
So, I applied a thinnish layer of timebond with a decorators spatula/scraper(the kind you might fill wall plaster with) to the tricky part of the screen landing and the edge of my leather piece. Once dry, it only really sticks to more stick so doesnt mess everything else up. The leather is then laid down with the glued edge rolled back as shown
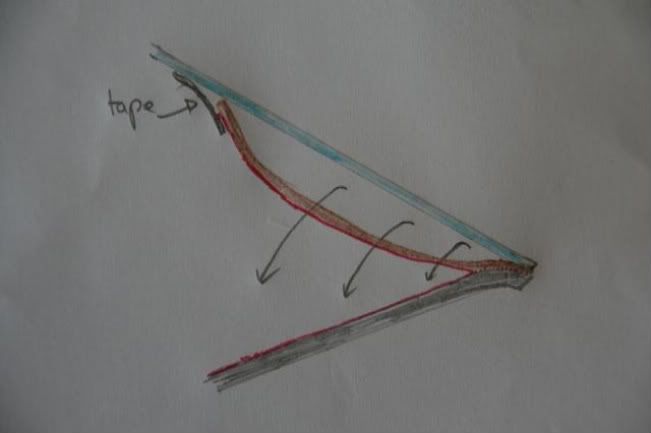
The edge is then gently worked down the crevice with another clean(and not too sharp) spatula untill fully seated. A decorators painting edge was also useful here. It was then left for 24hours until fully cured.
Next, the leather was held up to the screen with some tape - I now use Gorilla tape, its the best - and adhesive applied with a brush to everywhere else. It was then a very easy task to smooth down the trim over the entire dash, taking care to avoid wrinkles.
Here is the finished dash
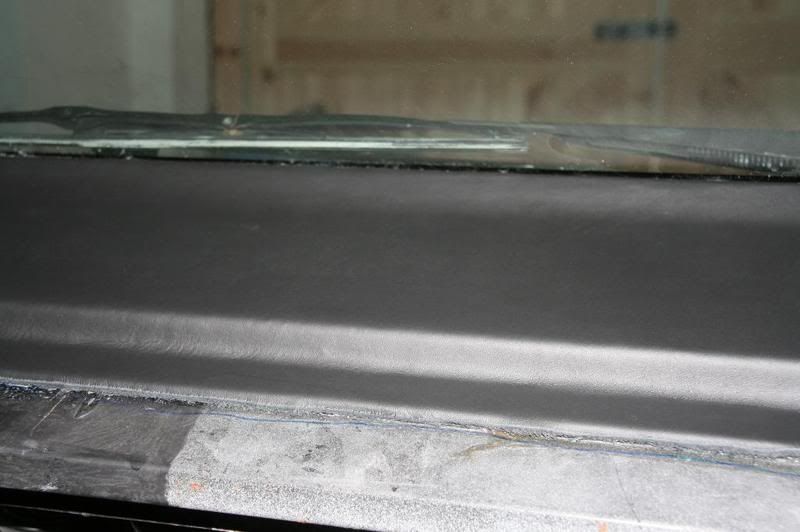
The image doesn't illustrate the area at all but hopefully you get the idea.
This next image demonstrates the area under the binnacle. Note that none of the holes are cut yet untill the adhesive has set fully. Also, the VIN plaque poses a problem - the front edge of the leather needed a 5mm cutout to accomodate this as the leather would not push down as far as everywhere else.
Job done!
4 Comments
Recommended Comments
Create an account or sign in to comment
You need to be a member in order to leave a comment
Create an account
Sign up for a new account in our community. It's easy!
Register a new accountSign in
Already have an account? Sign in here.
Sign In Now